
Article Summary: Cyber insurance applications have grown longer because of specific claim trends from 2023 and 2024 including the MOVEit supply-chain breach, the Change Healthcare ransomware incident and the Arup deepfake wire fraud. Each new section asks about specific security controls including immutable backups, layered MFA, callback verification on wires, EDR or MDR coverage, vendor risk and tested incident response. Answers that overstate your security posture can trigger rescission after a claim which means the policy is treated as if it never existed.
If you have a cyber insurance renewal coming up, the application is probably longer than the one you filled in last time. It is also more specific. Each new question maps to a control that (if missing) allowed a major 2023 or 2024 claim to escalate. The wording reflects how carriers responded to losses they paid in 2023 and 2024 and how you answer the form matters more than it used to.
This post covers why the application got longer, what each new section is asking, how to answer honestly without overstating your controls and what to fix in the 30 days before submission. The expensive mistake on a cyber insurance application is rescission where a future claim is denied because the carrier finds that the controls you declared were not in place at the time.
Why the Renewal Application Got Longer
The current generation of cyber insurance applications was shaped by three specific claim events from 2023 and 2024.
The MOVEit supply-chain breach surfaced on May 28, 2023 when Progress Software received the first reports of unusual activity from customers. The Cl0p ransomware group had been exploiting a previously unknown vulnerability in Progress Software's MOVEit Transfer file-sharing tool with activity detected by some researchers as early as February of that year. By late 2023, more than 2,650 organizations and over 66 million individuals had been affected with totals rising further into 2024. Carriers paid claims across that footprint and the experience reshaped how underwriters ask about third-party software risk.
Then the Change Healthcare ransomware incident in February 2024 froze US healthcare claims processing for weeks. The attacker gained network access on February 12, 2024 and deployed ransomware on February 21 with downstream impact on pharmacies, providers and patients across the country. HIPAA Journal's coverage noted that the absence of multifactor authentication on a key entry point made the initial intrusion possible. Industry analysts have estimated the cyber insurance loss from this single event at over $250 million and the response was tighter questions about backup immutability and incident response readiness.
The Arup deepfake wire fraud (also from early 2024) reframed how underwriters approach social engineering. A finance employee at the engineering firm's Hong Kong office transferred $25.6 million across 15 wires after a video call with what appeared to be the company's CFO and other executives (all of whom were AI-generated deepfakes). The fraud went undiscovered for about a week until the employee contacted Arup headquarters about a “secret transaction.” Out-of-band callback verification for wire transfers is now on every underwriter's checklist.
If you run an e-commerce store handling cardholder data, a healthcare practice with PHI, an accounting firm or law firm moving client funds or a real estate brokerage handling escrow, your application is the longest of all. You sit in the loss categories carriers got burned on.
The Backup Question Changed
The backup question on cyber insurance applications has tightened materially since 2023. What used to be a single yes/no question now asks whether those backups are immutable or air-gapped, when they were last tested and whether they can be deleted by your domain administrator credentials.
Expect wording on your form like: “Are backups stored in an immutable or air-gapped state, tested for restoration within the past 12 months and inaccessible to domain administrator credentials?”.
An immutable backup is one that nobody can delete or alter during a fixed retention window including someone using stolen administrator credentials. Air-gapped means the backup copy sits on infrastructure that cannot be reached from your production network. CISA's Stop Ransomware Guide lists immutable and tested backups as a baseline control which is the same standard most cyber insurance carriers now apply.
“Microsoft 365 backup” is no longer a passing answer on its own. Native Microsoft 365 retention isn't a backup in the sense the carrier means. Third-party backups that share the same identity perimeter as your production tenant can be wiped by a compromised global admin.
For the immutable backup question, the strongest answer references a backup platform with object lock or write-once-read-many storage enabled, an immutability window of at least 14 days (with 30 days now preferred), credentials separated from your production admin accounts and a recent successful restore test. Weaker answers describe daily backups to a NAS on the same network with no recent restore test which typically triggers follow-up underwriting and sometimes a premium adjustment. Answers that leave the immutability question unclear are the ones most likely to push a renewal toward sub-limits or non-renewal.
MFA Questions Go Deeper Than One Checkbox
MFA was once captured as a single yes/no question on most applications. The current generation asks whether MFA is enforced on email, VPN, remote desktop (RDP), all administrator accounts and privileged service accounts. The answer needs to be yes on all five for a clean pass.
SMS-based MFA is now treated as a weaker control. SIM-swap attacks and SS7 vulnerabilities have made text codes the weakest authentication factor available. Several carriers ask specifically whether your MFA uses an authenticator app, hardware token or push with number matching rather than SMS. If you are still on SMS for admin accounts, expect a follow-up question or a premium adjustment.
The privileged access management (PAM) question is the one most owners haven't seen before. PAM is a category of tool that keeps administrator credentials out of regular password managers. A PAM platform vaults privileged credentials, rotates them on use and logs every session which means a stolen admin password can't be used unnoticed for weeks before someone catches it.
A strong PAM answer describes a vaulting tool with credentials rotated on use and session logging enabled. Weaker answers like admin passwords stored in a shared password manager with annual rotation will usually trigger follow-up underwriting. Shared admin accounts that never rotate and produce no audit log of who used them are the configuration most likely to result in sub-limits or non-renewal.
Will cyber insurance be denied if you don't have MFA everywhere? Not always denied outright. Expect significant premium increases, sub-limits on ransomware coverage or exclusions for any incident that traces back to the unprotected entry point.
The Wire Transfer and Deepfake Verification Questions
After the Arup case and a string of business email compromise losses, carriers added callback verification questions to their applications. Callback verification means that before sending any wire above a defined threshold (commonly $10,000 or $25,000), the person authorizing the transfer calls the recipient at a phone number previously verified and stored rather than the number on the request email.
Expect wording like: “Does your organization require out-of-band verification using a previously known phone number for all funds transfer requests above [threshold] including requests appearing to come from executives?”.
Several current applications now ask separately whether staff have been trained on AI voice cloning and deepfake video risks. The Arup case made that question relevant for every carrier writing in professional services.
Accounting firms, law firms with escrow or trust accounts and real estate brokers will see this section scrutinized most carefully. Anyone moving other people's money is a soft target and an expensive claim when wire fraud lands.
A strong answer references a written wire transfer policy requiring callback verification to a verified number for transfers above a stated threshold, dual approval and annual social engineering training that includes deepfake awareness. Informal verification practice without a written policy will usually be flagged for follow-up. Wire transfers authorized by email approval alone are the configuration carriers are now declining to cover at all.
EDR, MDR and the End of the “We Have Antivirus” Answer
Traditional antivirus scans files against a list of known threats. Endpoint Detection and Response (EDR) watches behavior on each device and flags suspicious activity such as a process trying to encrypt files or escalate privileges. Managed Detection and Response (MDR) is EDR plus a 24/7 team watching the alerts and responding when something fires at 2am on a Sunday.
Current applications ask whether you have EDR deployed, whether it covers 100% of endpoints including servers and whether a 24/7 security operations center (SOC) monitors and responds to alerts. The MDR question is increasingly yes or no and the no answer has pricing consequences.
If you don't have MDR yet but plan to add it, say so plainly with a timeline. Underwriters can work with “MDR deployment scheduled for Q2 with vendor selected”. They cannot work with vague answers about future plans.
The Vendor Risk Questions
Supply chain questions used to be a single yes/no item. After MOVEit and Change Healthcare, carriers now want a full section on the software vendors holding your data.
Expect questions like: “List your top five software vendors with access to sensitive data and confirm whether each provides a SOC 2 Type II report or equivalent.” If you have never asked your practice management software vendor for a SOC 2 report, that conversation is overdue.
You are not expected to audit every vendor's security program in detail. The carrier wants to see that you know who your top vendors are, what data they hold and that you have asked the basic questions like SOC 2 attestation. An honest “we have identified our top five vendors and requested SOC 2 reports from three with two outstanding” reads better than a confident answer that falls apart in discovery.
The Mistake to Avoid: Misrepresentation and Rescission
The most expensive answer on a cyber insurance application is the one that overstates the security controls you have in place. Cyber insurance applications are warranty documents. If a forensic investigation after a claim finds your environment didn't match what you declared, the carrier can rescind the policy.
Rescission means the policy is treated as if it never existed, your claim is denied and any prior payouts under the same policy term can be clawed back. Some courts have found that the carrier doesn't need to prove a direct link between the misrepresentation and the loss. The misrepresentation itself is enough.
The cleanup approach is direct. If a question asks about MFA on all admin accounts and you have a gap, declare the gap and include a remediation date. Carriers reward honest gaps with a plan more than they reward polished answers that don't survive forensic review.
Checking “no” or “in progress” on the form may raise your premium or tighten your coverage terms. That cost is predictable. Misrepresentation discovered after a claim can void the policy entirely and the timing means you absorb the full incident cost yourself.
The 30-day Pre-Renewal Checklist
Work through this in order. Most items are achievable in a month if you start now.
Week 1. Confirm MFA on email, VPN, remote desktop, all administrator accounts and any service accounts that support it. Move admin MFA off SMS to an authenticator app or hardware token.
Weeks 1 to 2. Verify your backups are immutable or air-gapped. Run a test restore and document the result with date and screenshots.
Week 2. Write a one-page wire transfer policy requiring callback verification to a previously verified phone number for any transfer over your chosen threshold. Get it signed by anyone who can authorize payments.
Weeks 2 to 3. Confirm EDR is deployed on every endpoint and server. If you only have traditional antivirus, get quotes for EDR or MDR now so you can answer with a deployment timeline.
Week 3. Identify your top five software vendors and request SOC 2 reports or equivalent attestations. Note who responded.
Weeks 3 to 4. Document or update your incident response plan and then run a 60-minute tabletop exercise with your leadership team. Keep the notes. That is your “tested in the past 12 months” evidence.
Week 4. Sit down with the application and answer honestly. Flag anything you couldn't fix with a specific remediation date.
Article FAQs
What does rescission mean on a cyber insurance policy?
Rescission means the carrier voids the policy from inception after discovering material misrepresentation on the application. The policy is treated as if it never existed, the current claim is denied and any prior payouts under the same policy term can be clawed back.
Will my cyber insurance be denied if I don't have MFA on everything?
You are not always denied outright. Expect a significant premium increase, sub-limits on ransomware coverage or exclusions for incidents that trace back to the unprotected entry point. The most common gap is MFA on privileged or service accounts.
What is the difference between EDR and MDR on an insurance application?
EDR (Endpoint Detection and Response) is the technology that watches device behavior and flags suspicious activity. MDR (Managed Detection and Response) is the same technology plus a 24/7 team watching the alerts and responding. Carriers increasingly want both and the application often asks about each separately.
Why are cyber insurance renewal applications longer than they used to be?
Carriers added detailed sections in response to specific 2023 and 2024 losses including the MOVEit supply-chain breach, the Change Healthcare ransomware incident and the Arup deepfake wire fraud. Each event drove changes to backup, MFA, vendor risk or wire transfer questions on subsequent applications.
Can my cyber insurance claim be denied if I answered the application incorrectly?
Yes. Material misrepresentation on a cyber insurance application can trigger rescission which voids coverage retroactively. Many courts have found that the carrier does not need to prove a causal link between the misrepresentation and the specific loss.
What does immutable backup mean on a cyber insurance application?
A backup that cannot be modified or deleted for a defined retention period even by someone using stolen administrator credentials. Cloud object lock and write-once-read-many storage are common implementations. Most carriers want a window of at least 14 days with 30 days now preferred.
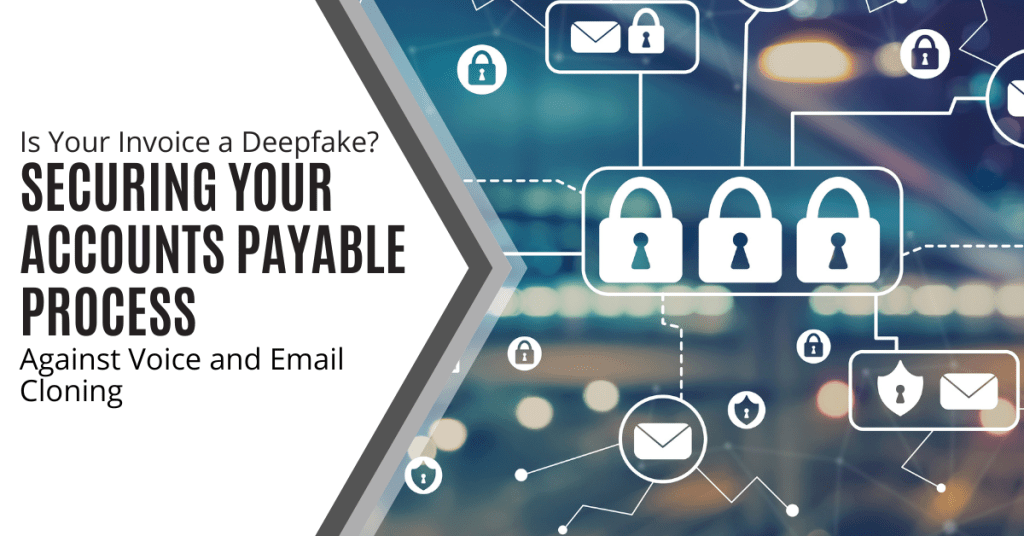
Article Summary: AI-enhanced fraud is changing how criminals target finance teams (especially Accounts Payable). Attackers can use AI to produce convincing emails, realistic invoices and even cloned voices that bypass the red flags teams once relied on. The most effective defense combines stronger verification steps, tighter payment processes and a culture where pausing to confirm details is always supported.
It is a statistic that sends a shiver down the backs of SME owners, managers and employees.
According to the FBI's 2025 Internet Crime Report, business email compromise (BEC) cost US businesses more than $3 billion last year.
This makes it one of the most financially damaging cybercrimes on record.
AI has made these attacks harder to detect. The question for AP teams is no longer whether they can identify suspicious requests. It is whether the processes around payments make fraud difficult regardless of how convincing it looks.
Why AP Teams Are in the Crosshairs
Accounts payable sits at the intersection of trust and timing. AP teams process invoices, manage supplier details and execute payments often under pressure to keep operations running smoothly.
For attackers, that combination is ideal.
Most successful fraud does not involve breaking into systems.
The FBI's Internet Crime Complaint Center (IC3) has consistently found that BEC attacks rely on impersonation. This involves posing as a trusted executive, supplier or internal colleague to redirect payments or update bank details before anyone notices.
AI has made that impersonation dramatically more scalable.
Where it once required skill and time to craft a convincing request, tools are now widely available that automate the research, writing and contextual tailoring that make fraud blend into normal AP workflows.
By mid-2024, an estimated 40% of BEC phishing emails were already AI-generated with that share expected to grow significantly.
What AI-Enhanced Fraud Looks Like in Practice
Emails That Blend into Normal Workflow
Traditional phishing relied on volume and imperfection. AI has changed that.
Modern BEC emails are grammatically correct and written in the specific tone of the executive or supplier being impersonated. They reference active projects, current invoice numbers and upcoming payment runs.
For AP teams processing high volumes of routine communications, that level of familiarity is exactly what lowers the guard.
Invoice and Payment Redirection
One of the most common AP fraud patterns involves payment redirection.
Attackers may intercept a legitimate invoice exchange and quietly alter the destination account. They then send a short message claiming a supplier has updated its banking details or re-issue a real invoice with minor modifications.
The surrounding content looks entirely legitimate because it is drawn from real correspondence.
Voice Cloning and Executive Impersonation
Email isn’t the only channel being exploited.
AI voice-cloning tools can replicate a person’s voice from a short audio sample. That makes it possible to leave convincing voicemails or place calls that sound like a known executive.
For AP teams accustomed to verbal approvals on high-value or urgent payments, this removes one of the few remaining verification methods that email security alone cannot address.
Why Traditional Checks No Longer Work
Security awareness training still matters and investing in it remains worthwhile. However, AI has changed what AP teams are up against.
Attacks no longer contain the signals that training programs once focused on like awkward phrasing, mismatched logos, odd sender addresses or generic greetings.
Modern fraud emails can reference the recipient's organization, active suppliers and current invoice values drawn from publicly available or previously intercepted sources.
When a fraudulent request is indistinguishable from a legitimate one, placing the burden of detection on the AP team puts it in the wrong place.
The organizations that reduce risk are not asking staff to be more suspicious. They are building verification processes that work independent of how a message looks.
Building Process Around the Risk
The most effective defense is not sharper instincts. It is removing ambiguity from high-risk actions.
Out-of-band Verification as Standard
Any request to change supplier bank details or approve an urgent payment outside the normal cycle should require secondary confirmation through a known independent channel (not a reply to the same email thread). Calling a supplier on a number already on file or confirming with a colleague directly breaks the impersonation chain regardless of how convincing the original request appeared. This step does not require technology. It requires a written procedure and the team's habit of following it.
Layered Access and Authentication Controls
Restricting access to financial systems and enforcing multi-factor authentication limits the damage a compromised account can cause. If an attacker gains access to a vendor's email, MFA requirements on the receiving end create friction that can slow or stop a fraudulent change before any money moves.
A Culture that Supports Slowing Down
Fraud prevention improves when staff feel safe questioning requests (including from senior leadership).
A team member who pauses a payment to verify it is not being obstructive. They are doing exactly what good process requires.
Building that culture starts with leadership modeling the behavior and making clear that slowing down on high-risk actions is always the right call.
The FBI's 2025 Internet Crime Report included a dedicated AI section for the first time and logged more than $893 million in AI-enabled scam losses across more than 22,000 complaints.
When verification is standard and questioning is encouraged, AI-enhanced fraud loses much of its advantage.
The technology attackers use is advancing quickly but the process controls that contain the damage do not need to be complicated. They need to be consistent.
Shift the Burden from People to Process
Concerned about AI-enhanced fraud targeting your finance teams or clients?
Contact us or schedule a consultation to review your current controls and identify where the most important gaps are.
Article FAQs
Why are Accounts Payable teams targeted so often?
AP teams manage payments and supplier details which makes them a direct path for attackers to move money without breaching technical systems.
Can awareness training alone stop AI-driven fraud?
No. Awareness helps but AI scams often look legitimate. Strong verification processes are essential.
Is voice-based fraud really a risk?
Yes. AI voice cloning allows attackers to impersonate executives convincingly which makes phone-based approvals vulnerable.

The most dangerous thing in a server room is often the phrase, “Don’t touch that.”
It is usually said with a half-joke and a grimace. It refers to the old box that “still works”, runs something important and has survived so many fixes and workarounds that nobody feels confident changing it anymore.
That is legacy debt.
Not just “old tech”. Old tech that has become a dependency. It is the kind that quietly accumulates risk until it turns into downtime, security exposure or an emergency upgrade at the worst possible time.
A legacy debt audit is the fast way to bring that risk back into the light.
What Legacy Debt Really Looks Like
Legacy debt isn’t “old gear”. It is old gear that has become normal.
It is the server that runs a critical app, the edge device nobody remembers buying or the workaround that turned into a dependency. Over time, that debt stacks up quietly.
Infinite Lambda describes legacy debt as something that “happens even to the best systems,” “silently accruing costs and constraints,” and it can “accumulate basically unnoticed until it is too costly to ignore.”
That is why a legacy debt audit isn’t a theoretical exercise. It is a visibility exercise to bring the oldest and highest-leverage risks back onto the list of things you actively manage.
The security problem shows up when “old” becomes “unpatchable”.
The UK’s NCSC guidance on obsolete products says, “Ideally, once out of date, technology should not be used,” and “the only fully effective way to mitigate this risk is to stop using the obsolete product.”
If something can’t be updated, weaknesses don’t age out. They sit there waiting for the wrong day.
Legacy debt also looks like basic server hygiene slipping.
NIST SP 800-123 frames secure server operations as an ongoing process: “Maintaining the secure configuration through application of appropriate patches and upgrades, security testing, monitoring of logs and backups…”
It also calls out foundational hardening steps like “Patch and upgrade the operating system” and “Remove or disable unnecessary services, applications and network protocols.”
When those basics become inconsistent, legacy debt turns into a reliability and incident-response problem instead of just a security one.
Legacy debt often hides at the edge. If you have end-of-support internet-facing devices, you have high-leverage risk in the most exposed place.
The 3 Oldest Risks to Find First
These three categories are where “old” most often turns into outsized risk because they combine age with leverage. They either sit at the front door, can’t be fixed anymore or have quietly drifted out of a safe baseline.
Risk #1: End-of-support edge devices
If you are looking for high-leverage legacy debt, start at the edge. Firewalls, VPN gateways, routers and other internet-facing devices are the front door to your environment.
When they reach end-of-support (EOS), they don’t just become outdated. They become harder to defend because security fixes stop arriving.
What to check in your audit
- List every edge device (firewall, VPN, router) and the support status for each one.
- Confirm which ones are internet-facing and which services are exposed.
- Identify devices that can’t run the current firmware or no longer receive updates.
Risk #2: Obsolete products that can’t be fixed anymore
Obsolete products are the purest form of legacy debt. They include things that are still operating but no longer receive security updates. That means every new vulnerability becomes permanent.
In other words, there is no clever workaround that makes an unsupported system “safe”. There are only risk reductions until you can replace it.
What to check in your audit:
- Identify anything past support: server OS versions, appliances, old hypervisors and line-of-business apps.
- Flag systems that require exceptions like the ones with old protocols, weak auth and special firewall rules.
- Find the “business-critical but unsupported” systems.
Risk #3: “It still works” servers with neglected basics
This is the sneakiest risk because it looks normal.
The server is supported. The hardware runs. Nobody is complaining. However, the basics have drifted. Patching is inconsistent, unnecessary services are still running and backups have not been proven under pressure.
SP 800-123 Guide to General Server Security frames secure server operations as an ongoing discipline including “patches and upgrades”, “monitoring of logs” and “backups.”
It also calls out core hardening steps like “Patch and upgrade the operating system” and “Remove or disable unnecessary services, applications and network protocols.”
Those are the unglamorous fundamentals that stop small problems from turning into long outages.
What to check in your audit:
- Patch reality: What is the current patch level and how often do updates slip?
- Service sprawl: What is running that doesn’t need to be running?
- Admin and service accounts: Where are the broad permissions and shared credentials?
- Backup confidence: When was the last restore test and did it succeed?
- Change control: Who can make changes and how are they tracked?
Stop Carrying Silent Risk
Legacy debt doesn’t announce itself. It sits quietly in the background until the day it becomes downtime, exposure or an emergency upgrade you didn’t plan for.
A legacy debt audit gives you control back by turning “we should deal with that someday” into a shortlist you can act on. Start with the highest-leverage risks like end-of-support edge devices, obsolete products that can’t be patched and servers where the basics have drifted. Then assign owners, set dates and move one item at a time from “too scary to touch” to “handled”.
Contact us for help running your next legacy debt audit.

Article summary: Browser extensions feel small but they operate inside your browser with access to passwords, session tokens, browsing activity and the content of every page your team visits. A quarterly audit process, a clear approval path and permission-based review close most of these gaps without disrupting how your team works.Read more

Article summary: Local admin rights are one of the most overlooked drivers of the repeat support tickets you submit to your IT provider. Most admin access was granted years ago for a one-time need and never removed, leaving your provider's team managing dozens of individually customized machines. By revoking local admin rights and replacing them with a controlled elevation process, you stabilize your endpoints, shrink your attack surface, and cut your support queue at the same time.Read more

A fake recruiter message is one of the cleanest social engineering tricks around because it doesn’t look like a trick.
That is why LinkedIn recruitment scams work so well inside real businesses.
They don’t arrive as malware. They arrive as a normal conversation that nudges someone toward one small action. Click this link, open this file, “verify” this detail and move the chat to a different app.
A few simple checks, a couple of hard-stop rules and an easy way to report suspicious outreach can shut these scams down without slowing anyone down.
LinkedIn Recruitment Scams
LinkedIn recruitment scams artfully blend into normal professional behavior.
The message doesn’t look like a “cyber attack.” It looks like networking and it borrows credibility from recognizable brands, polished profiles and familiar hiring language.
At platform scale, the volume is also hard to wrap your head around.
Rest of World reports that LinkedIn said it “identified and removed 80.6 million fake accounts” at registration from July to December 2024. A LinkedIn spokesperson claimed “over 99%” of the fake accounts they remove are detected proactively before anyone reports them.
Even with that level of detection, enough scam activity still leaks through to reach real employees. That is especially true when scammers tailor their approach to what looks credible in a specific industry and location.
The other reason these scams succeed is that they follow a predictable persuasion pattern: urgency, authority and a quick push to “do the next step.”
The FTC describes scammers impersonating well-known companies and then steering targets toward actions that create leverage. These actions include handing over sensitive personal information or sending money for “equipment” or other upfront costs.
Once someone is rushed into treating the process as real, the scam doesn’t need to be technically sophisticated. It just needs the victim to keep moving.
The Scam Pattern Most Teams Miss
1. A polished approach on LinkedIn
The profile looks credible enough, the role sounds plausible and the message is written in a professional tone. The job post itself may still be oddly generic though.
Amoria Bond notes that fake job postings often “lack details” and lean on broad language to catch as many people as possible.
2. A quick push off-platform
The conversation shifts to email, WhatsApp/Telegram or a “recruitment portal” link. That shift is important because it removes the built-in friction of LinkedIn’s environment and makes it easier to send links, files and instructions.
3. A credibility wrapper: “assessment”, “interview pack” or “onboarding”
Airswift flags link/attachment requests and urgency tactics as common red flags. The story is usually something like: “Download this assessment”, “Review these onboarding steps” or “Log in here to schedule.”
Tag Apps
Make decisions visible and repeatable by tagging apps.
Microsoft explicitly calls tagging apps as sanctioned or unsanctioned an important step because it lets you filter, track progress and drive consistent action over time.
4. The pivot: money, sensitive info or account takeover
Scammers impersonate well-known companies and then ask for things legitimate employers typically don’t: payment for “equipment” or early requests for personal information.
Another variation is more subtle: “verification” steps that are really designed to steal identity details or compromise accounts.
5. Pressure to keep moving
If someone hesitates, the scam leans on urgency: “limited slots”, “fast-track hiring” or “complete this today”. That is why Forbes frames the key skill as slowing down and checking details because the scam depends on momentum.
Red Flags Checklist for Staff
Here are the red flags to look out for.
Red flags in the job posting
- The role is oddly vague or overly broad. Generic responsibilities, unclear reporting lines and “we will share details later” language are common in fake listings.
- The company's presence doesn’t match the brand name. Thin company pages, inconsistent logos/branding or a web presence that feels incomplete are worth pausing on.
- The process is “too easy and too fast.” If the listing implies immediate hiring with minimal steps, treat it as suspicious.
Red flags in recruiter behavior
- They push you off LinkedIn quickly. Moving to WhatsApp/Telegram or personal email early is a common tactic.
- They use a personal email address or unusual contact details. Be specifically cautious of recruiters using free webmail accounts instead of a company domain.
- They avoid verification. If they dodge basic questions, treat that as a signal rather than a scheduling issue.
Hard-stop requests
- Any request for money or fees. Application fees, equipment purchases, “training costs”, gift cards or crypto is a hard stop.
- Requests for sensitive personal info early. Bank details, identity documents, tax forms or “background checks” before a real interview process is established.
- Requests for verification codes. If anyone asks you to read back a one-time code sent to your phone/email, assume they are trying to take over an account.
- Requests for non-public company information like org charts, internal system details, client lists, invoice processes and security tools. Look out for requisitions for anything beyond what a recruiter would reasonably need.
Stop Scams With Simple Defaults
LinkedIn recruitment scams don’t succeed because staff are careless. They succeed because the outreach looks normal, the process feels familiar and the next step is always framed as urgent.
The fix isn’t turning everyone into an investigator. It is setting simple defaults that make scams harder to complete. Slow down before clicking, verify the recruiter and role through official channels, keep conversations on-platform until identity checks out and treat money requests, code requests and early personal data demands as hard stops.
When those habits are standardized, the scam loses its leverage.
Reach out to us today to make sure you have the latest tools to fight this and other types of scams.

At home, security incidents don’t look like dramatic movie hacks. They look like stepping away from your laptop during a delivery or leaving it unlocked while you grab something from another room.
Those ordinary moments repeated over time are how work devices end up exposed.
A remote work security checklist focuses on simple and practical controls that hold up in real life. Put it in place once, make it routine and you will prevent the kinds of issues that hurt most because they were entirely avoidable.
Why Home Is a Different Security Environment
A work laptop doesn’t magically become “less secure” at home. However, the environment around it does.
In the office, there are built-in boundaries: fewer shared users, fewer casual touchpoints and more predictable networks. At home, that same laptop is suddenly operating in a space designed for convenience rather than control.
For starters, physical exposure goes up.
At home, devices move from room to room, sit on tables and countertops and are left unattended for short stretches throughout the day.
That is why a remote work security checklist must treat physical security as part of cyber security.
In its training on device safety, CISA stresses the basics: keep devices secured, limit access and lock them when you are not using them. Those simple habits matter more at home because there is no “office culture” quietly enforcing them for you.
Home is where work and personal life collide and that creates messy and very human risks.
The NI Cyber Security Centre is blunt about it. Don’t let other people use your work device and don’t treat it like the family laptop.
The network is different.
Home Wi-Fi often starts with default settings, old router firmware or passwords that have been shared with everyone who has ever visited.
CISA’s guidance on connecting a new computer to the internet offers the baseline steps many people skip at home. Secure your router, enable the firewall, use anti-virus and remove unnecessary software and default features.
Remote access raises the stakes for identity. In its remote workforce security guidance, Microsoft’s best practices frames remote security around a Zero Trust approach and emphasizes that access should be strongly authenticated and checked for anomalies before it is granted.
The Remote Work Security Checklist
Use this remote work security checklist as your “minimum standard” for company laptops at home. It is designed to be practical, repeatable and easy to enforce without turning everyone into part-time IT employees.
Lock the Screen Every Time You Step Away
Set a short auto-lock timer and get into the habit of locking manually even at home.
Store the Laptop Like It Is Valuable
Assume that “out of sight” is safer than “out of the way.” When you are finished, store your device somewhere protected rather than on the couch, the kitchen counter or in the car.
Don’t Share Work Laptops with Family
At home, good intentions can still lead to accidental clicks. Even a quick “just checking something” can result in risky downloads, unfamiliar logins or unwanted browser extensions.
Use a Strong Sign-In and MFA
Use a long passphrase instead of a clever but short password and never reuse it across accounts. Treat multifactor authentication (MFA) as a baseline requirement instead of a nice extra.
Stop Using Devices That Can’t Update
If a laptop can’t receive security updates, it is not a work device. It is a risk.
Patch Fast
Updates are where most known issues get fixed. The longer you wait means the bigger the risk. Enable automatic updates and restart when prompted.
Secure Home Wi-Fi Like It Is Part of the Office
Use a strong Wi-Fi password and enable modern encryption. If your router still has the default admin login or hasn’t been updated in a long time, consider that your cue to fix it.
Use the Firewall and Keep Security Tools Switched On
Turn on your firewall, keep antivirus software active and make sure both are properly configured. If security tools feel inconvenient, don’t switch them off. Address the friction instead.
Remove Unnecessary Software
The more apps you install means the more updates you need to manage and the more opportunities there are for something to go wrong. Remove software you don’t need, disable unnecessary default features and stick to approved applications from trusted sources.
Keep Work Data in Work Storage
Storing work data in approved systems keeps access controlled, audit-ready and much easier to recover if something goes wrong. Avoid saving work documents to personal cloud accounts or personal backup services.
Be Wary of Unexpected Links and Attachments
If a message pressures you to click, open, download or “confirm now” treat it as suspicious. When in doubt, verify the request through a separate trusted channel before taking any action.
Only Allow Access From “Healthy Devices”
The safest remote setups gate access based on device health. Microsoft warns that unmanaged devices can be a powerful entry point and stresses the importance of allowing access only from healthy devices.
Are Your Laptops “Home-Proof”?
If you want remote work to remain seamless, your devices need to be “home-proof” by default.
That means treating the fundamentals as non-negotiable: automatic screen locks, secure storage, protected sign-ins, timely updates, properly secured Wi-Fi and work data stored only in approved locations.
Nothing complicated. Just consistent execution.
Start by adopting this remote work security checklist as your baseline standard. When the defaults are strong, you reduce avoidable incidents without slowing anyone down.
If you would like help turning these basics into a practical and enforceable remote work policy, contact us today. We will help you standardize protections across your team so remote work stays productive and secure.

Article summary: Personal apps, personal cloud accounts and reused passwords on work devices create security gaps that IT rarely sees until something goes wrong. Shadow IT has grown sharply alongside remote and hybrid work and the most common risks are easy to miss. A few straightforward habits and clear policies close most of these gaps without disrupting how your team works day to day.
Most small businesses are thoughtful about who has keys to the building. Fewer are as deliberate about what employees are doing on their work devices at home.
A personal Gmail account used to share a work document. Personal cloud storage for a large file that needs to move quickly. A browser that auto-fills a personal login on a work machine along with every other saved credential.
These habits feel harmless in the moment. They are where data exposure quietly begins.
Closing these gaps doesn't require a major security overhaul. It starts with understanding where business security becomes a daily habit instead of just a policy document.
Why Everyday Habits Create Real Security Gaps
Shadow IT is the term for using apps, accounts or tools that haven't been reviewed or approved by your IT team. It is rarely intentional wrongdoing. Employees reach for familiar and convenient tools when the approved alternatives feel slower or harder to access.
The security problem is a visibility problem. IT can only monitor, patch and protect the tools it knows about. When work data flows through a personal cloud account, a personal messaging app or an unapproved browser extension, that data leaves the managed environment entirely.
A Dashlane survey of 1,500 employees found that nearly 4 in 10 people regularly use unapproved applications on company hardware.
Research cited by Cloudflare shows shadow IT usage increased 59% with the shift to remote and hybrid work with 54% of IT teams saying their organizations are significantly more exposed to a data breach as a result.
This isn't a fringe concern. It is likely happening across your business right now even if no one is tracking it.
The same dynamic applies to AI tools. Our guide on running a shadow IT audit walks through how to find what is being used without slowing your team down.
Where the Lines Blur Most Often
Shadow IT risk doesn't come from one single habit. It comes from the accumulation of small decisions that each seem reasonable on their own.
Password Reuse Across Personal and Work Accounts
When a staff member uses the same password for a personal streaming account or shopping site as they do for their work email, a breach of the personal account can expose the work one. Attackers count on this.
It is called credential stuffing. It is taking passwords stolen from one breach and automatically testing them across hundreds of other services. Your business doesn't need to be breached directly. A supplier, a retailer or any other service your employee uses personally can be the starting point.
According to Cybernews, only 6% of analyzed passwords were unique. The scale of credential reuse means that a breach at an unrelated service is (statistically) also a test of your work systems.
It is the same mechanism behind password spraying attacks. This is where attackers work systematically through common or previously exposed credentials until something opens.
Personal Cloud Storage for Work Files
Google Drive, Dropbox and iCloud are useful personal tools that employees often reach for when moving a large file or picking up work on a personal device. When work documents land in a personal cloud account, they are outside your organization's access controls, encryption policies and retention rules.
If that personal account is later compromised or the employee leaves the company, the data goes with them.
Browser Extensions and Personal Logins on Work Browsers
Many browser extensions have broad permissions like access to page content, form data and session activity across every site the browser visits. Personal extensions installed on a work browser may be sending data to third-party servers without the employee or IT team realizing it.
Saved personal passwords in a work browser profile create a separate risk. There is a hidden bridge between personal and professional credentials that standard security reviews rarely catch.
Personal Email and Messaging Apps on Work Devices
Sending a work file to a personal inbox to finish it at home is one of the most common habits in any office. It bypasses spam filtering, encryption standards and IT monitoring in a single step. Phishing attacks that reach a personal inbox where protections are often weaker can arrive on a work device and spread from there.
A Simple Habit Checklist for Your Team
None of these changes are technically complicated. The barrier is usually awareness and access to better defaults.
1. Keep work and personal browser profiles completely separate.
Most major browsers support separate profiles with different saved passwords, extensions and sync settings. A dedicated work profile means personal credentials don't auto-fill on work sessions and personal extensions don't have access to work activity. This single step eliminates a wide category of accidental data mixing.
2. Never reuse a password between a personal and work account.
CISA's Secure Our World program recommends using unique and strong passwords for every account and a password manager to make that realistic.
When every account has its own credential, a breach somewhere else stays contained. If your organization doesn't already provide a company-approved password manager, that is worth addressing.
3. Use company-approved tools for work files.
Before reaching for personal Dropbox or a personal Google account to move a work file, employees should know what the approved alternative is. Most businesses already have one like SharePoint, OneDrive or Google Workspace. Making those options easy to access removes the main reason employees default to personal tools.
4. Review browser extensions quarterly.
Set a simple reminder to check what extensions are installed on work browsers. Remove anything not actively needed for work and pay attention to extensions with broad site permissions. An annual or quarterly extension review is a quick task that closes a category of risk most security audits miss entirely.
5. Report unauthorized tools before they become a problem.
Employees often know they are using something unapproved but stay quiet because they don't want it removed. An open process where staff can flag what they are using or request approval for a new tool is far healthier than a policy that pushes the behavior underground. Visibility is the starting point for managing shadow IT risk.
Ready to Close the Gaps That Policies Miss?
Personal web habits are one of the most common sources of shadow IT risk in small businesses and one of the easiest to address once they are visible.
The fix isn't a complicated project. It is a clear inventory of what is being used, approved alternatives in place and a team that understands why the habits matter.
Contact Sound Computers to schedule a consultation. We can help you identify what is running on your network, establish practical policies your team will actually follow and close the gaps before they become a problem. Call us at (860) 577-8060, reach us online or email info@soundcomputers.net.
Article FAQs
What is shadow IT?
Shadow IT is the use of apps, tools, accounts or devices that haven't been approved or reviewed by your IT team. It is usually driven by convenience rather than intent but it creates gaps in visibility and security.
Why is password reuse between personal and work accounts risky?
When a personal account is compromised in a data breach elsewhere, attackers automatically test those same credentials against business systems. This is credential stuffing and it is one of the most common ways work accounts are accessed without authorization. Using a unique password for every account managed through a password manager is the straightforward fix.

Article summary: Passwords are the most common entry point for business data breaches and complexity rules or standard MFA still leave credential theft on the table. Passkeys are phishing-resistant by design and now supported across every major platform. A phased passkey migration reduces your attack surface, cuts IT support overhead and replaces the most exploited vulnerability in your security stack without disrupting daily work.
Every breach starts somewhere.
More often than not, it starts with a login.
A staff member reuses a password from an old account. Someone approves a convincing phishing page without a second look. A credential stolen months earlier gets quietly tested against your systems until one of them opens.
Passwords were not built for the speed or scale of today's attacks. They rely on people to remember, rotate and protect a string of characters under conditions that make that increasingly unrealistic.
That is what passkeys are designed to fix.
Getting proper authentication controls in place for your team is no longer a complicated project. Passkeys are built into the devices your staff already use and migrating to them is more manageable than most small businesses expect.
Why Passwords Are Failing Your Business
The fundamental problem with passwords is that they are shared secrets. Your system stores them. Your staff carries them. Attackers collect them at scale.
Compromised credentials were involved in over 80% of data breaches in 2024.
Verizon's 2024 Data Breach Investigations Report found that stolen or weak credentials were a factor in the vast majority of incidents studied. The attacks have gotten faster and more automated but the entry point stays the same.
Tactics like password spraying (where attackers test a short list of common passwords across hundreds of accounts) are designed to slip past lockout policies entirely. A staff member who follows every password rule can still become an entry point if their credentials have appeared in an unrelated breach somewhere else.
Password resets make the picture worse. Each one drains IT time, frustrates the person locked out and creates its own risk when the reset link travels over an email account that may already be compromised.
What Is a Passkey?
A passkey is a login credential that uses cryptography instead of a memorized secret.
When a passkey is created, the device generates two linked keys. The private key stays on the device and never leaves it. The public key is stored by the service. To log in, the service sends a cryptographic challenge. The device signs it using the private key and authentication is complete.
No password changes hands. Nothing is transmitted that can be stolen.
Passkeys are built on FIDO2/WebAuthn which are open standards developed by the FIDO Alliance, a cross-industry consortium, and the World Wide Web Consortium (W3C).
Because the private key is mathematically bound to the exact website it was registered with, a fake login page cannot use it. The phishing attempt simply fails at the technical level.
What Passkeys Actually Change
The security argument stands on its own. However, passkeys also reduce friction in ways that show up in day-to-day operations.
Organizations report up to 81% fewer sign-in-related help desk calls after deploying passkeys.
The FIDO Alliance's Passkey Index tracks real-world deployment data from Amazon, Google, Microsoft, PayPal and others. Passkeys achieve a 93% login success rate compared to 63% for traditional methods.
For staff, the experience is noticeably more simple. Where MFA (multi-factor authentication) requires a password and a one-time code, a passkey replaces both with a single biometric prompt. If you have ever weighed the different MFA options available and found them all add a layer of friction, passkeys are where that trade-off resolves.
Microsoft reports passkeys are three times faster than traditional passwords and eight times faster than password plus MFA. That is not just convenience. It is operational time recovered across every login every single day for every person on your team.
Your Step-by-Step Passkey Migration Plan
Migrating to passkeys doesn't mean flipping a switch. A phased rollout keeps work moving while steadily reducing your dependence on passwords.
1. Audit your current logins.
Start by listing every system your staff authenticates into: email, line-of-business apps, cloud storage, accounting tools, remote access. Note which platforms already support passkeys. Most major ones do including Microsoft 365, Google Workspace and the majority of common SaaS tools.
If a platform doesn't support passkeys yet, note it separately. That is not a blocker for getting started. It just means those accounts stay password-protected for now.
2. Prioritize your highest-risk accounts.
Start with the accounts attackers target first: admin logins, finance tools, anything holding sensitive client data or giving broad system access. These benefit most from phishing-resistant credentials and migrating them first moves the security needle fastest.
3. Choose your authentication method.
Most staff can use devices they already own. Windows Hello, Apple Face ID and Touch ID and Android biometrics all support passkeys natively. For shared workstations or roles that require higher assurance, hardware security keys are the more controlled option.
4. Roll out in phases instead of all at once.
Enroll a pilot group first. IT staff or a handful of technically comfortable team members are the best choice. Work through any friction, refine the enrollment steps and document what you learn. Then expand to the wider organization in manageable waves.
Keep passwords available as a fallback during the transition. The goal is a gradual shift rather than a hard cutover that leaves anyone stuck.
5. Plan account recovery before you need it.
The most common concern about passkeys is what happens when an employee loses or breaks their device. The answer is to sort this out before rollout instead of after.
Synced passkeys backed up through Microsoft, Google or Apple accounts can be restored on a new device using the employee's existing account access. For hardware key setups, a documented recovery process and a backup key for the most critical roles are both worth the effort to set up now.
Time to Move Your Team Off Passwords
Passwords will remain part of the landscape for a while. However, every account you migrate to a passkey removes a target.
A passkey migration doesn't need to be a major project. It needs a clear account inventory, a sensible rollout sequence and a recovery plan that is documented and tested before anyone relies on it.
Contact Sound Computers to schedule a consultation. We can help you map which accounts to prioritize, guide your team through enrollment and make sure recovery is covered before you go live. Call us at (860) 577-8060, reach us online or email info@soundcomputers.net.
Article FAQs
What is a passkey?
A passkey is a login credential based on cryptographic key pairs rather than a memorized password. The private key stays on your device and is unlocked by a fingerprint, face scan or PIN. The public key is stored by the service. Nothing is transmitted that can be phished or stolen in a data breach.
Are passkeys more secure than passwords?
Yes. Passkeys are bound to the specific website they were created for so they cannot be used on fake login pages. There is no shared secret to steal. They eliminate the main attack categories that compromise password-based accounts: phishing, credential stuffing and password reuse.
Do passkeys work for small businesses?
Yes. Passkeys are built into Windows, macOS, iOS and Android and are supported by Microsoft 365, Google Workspace and most widely used business applications. A small business can migrate in phases using the devices its staff already own without specialist hardware.

Ransomware is not a jump scare. It is a slow build.
In many cases, it begins days (or even weeks) before encryption with something mundane like a login that never should have succeeded.
That is why an effective ransomware defense plan is about more than deploying anti-malware. It is about preventing unauthorized access from gaining traction.
Here is a five-step approach you can implement across your small-business environment without turning security into a daily obstacle course.
Why Ransomware Is Harder to Stop Once It Starts
Ransomware is rarely a single event. It Is typically a sequence: initial access, privilege escalation, lateral movement, data access, data theft and finally encryption once the attacker can inflict maximum damage.
That is why relying on late-stage defenses tends to get messy.
Once an attacker has valid access and elevated privileges, they can move faster than most teams can investigate. Microsoft says, “In most cases attackers are no longer breaking in. They’re logging in.”
By the time encryption begins, options are limited. The general guidance from law enforcement and cybersecurity agencies is clear. Don’t pay the ransom. There is no guarantee you will recover your data and payment can encourage further attacks.
There isn’t a silver bullet for preventing a ransomware attack. A ransomware defense plan is most effective when it disrupts the attack before encryption ever begins. That is why recovery needs to be engineered upfront rather than improvised mid-incident.
The goal isn’t “stop every threat forever.” The goal is to break the chain early and limit how far an attacker can move. If the worst happens, you want recovery to be predictable.
The 5-Step Ransomware Defense Plan
This ransomware defense plan is built to disrupt the attack chain early, contain the damage if access is gained and ensure recovery is dependable. Each step is practical, easy to implement and repeatable across small-business environments..
Step 1: Phishing-Resistant Sign-Ins
Most ransomware incidents still begin with stolen credentials. The fastest win is to make “logging in” harder to fake and harder to reuse once compromised.
What this means: “Phishing-resistant” sign-ins are authentication methods that can’t be easily compromised by fake login pages or intercepted one-time codes. It is the difference between “MFA is enabled” and “MFA still works when someone is specifically targeted.”
Do this first:
- Enforce strong MFA across all accounts with priority given to admin accounts and remote access.
- Eliminate legacy authentication methods that weaken your security baseline.
- Implement conditional access rules such as step-up verification for high-risk sign-ins, new devices or unusual locations.
Step 2: Least Privilege + Separation
What this means: “Least privilege” means each account gets only the access it needs to do its job and nothing more.
“Separation” means keeping administrative privileges distinct from everyday user activity so a single compromised login doesn’t hand over control of the entire business.
NIST recommends verifying that “each account has only the necessary access following the principle of least privilege.”
Practical moves:
- Keep administrative accounts separate from everyday user accounts.
- Eliminate shared logins and minimize broad “everyone has access” groups.
- Limit administrative tools to only the specific people and devices that genuinely require them.
Step 3: Close Known Holes
What this means: “Known holes” are vulnerabilities attackers already know how to exploit because systems are unpatched, exposed to the internet or running outdated software. This step is about eliminating easy wins for attackers before they can take advantage of them.
Make it measurable:
- Set clear patch guidelines: Critical vulnerabilities addressed immediately, high-risk issues next and all others on a defined schedule.
- Prioritize internet-facing systems and remote access infrastructure.
- Cover third-party applications and not just the operating system.
Step 4: Early Detection
What this means: Early detection means identifying ransomware warning signs before encryption spreads across the environment.
Think alerts for unusual behavior that enable rapid containment rather than a help desk ticket reporting that files suddenly won’t open.
A strong baseline includes:
- Endpoint monitoring that can flag suspicious behavior quickly
- Rules for what gets escalated immediately vs what gets reviewed
Step 5: Secure and Tested Backups
What this means: “Secure and tested backups” are backups that attackers can’t easily access or encrypt and that you have verified you can restore successfully when it matters most.
Both NIST’s ransomware guidance and the UK NCSC emphasize that backups must be protected and restorable. NIST specifically calls out the need to “secure and isolate backups.”
Keep backups up-to-date so you can recover “without having to pay a ransom” and check that you know how to restore your files.
Make backups real:
- Keep at least one backup copy isolated from the main environment.
- Run restore drills on a schedule.
- Define recovery priorities ahead of time for what needs to be restored first and in what sequence.
Stay Out of Crisis Mode
Ransomware succeeds when environments are reactive because everything feels urgent, unclear and improvised.
A strong ransomware defense plan does the opposite. It turns common failure points into predictable and enforced defaults.
You don’t need to rebuild your entire security program overnight. Start with the weakest link in your environment, tighten it and standardize it.
When the fundamentals are consistently enforced and regularly tested, ransomware shifts from a headline-level crisis to a contained incident you are prepared to manage.
If you would like help assessing your current defenses and building a practical and repeatable ransomware protection plan, contact us today to schedule a consultation. We will help you identify your biggest exposure points and turn them into controlled and measurable safeguards.